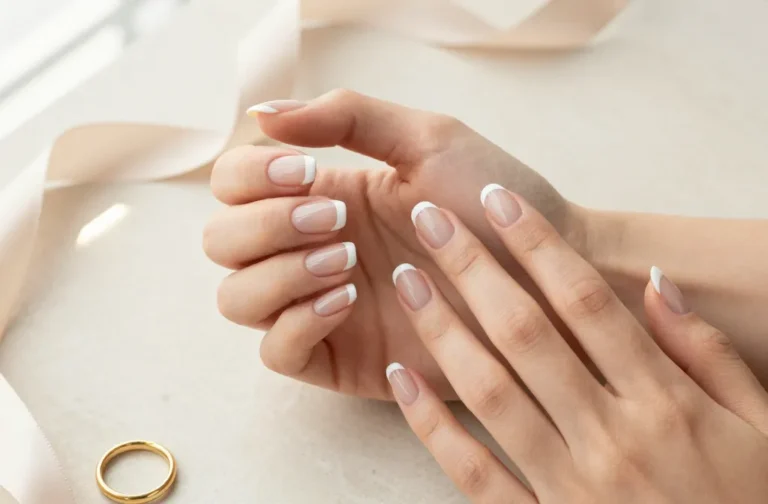
10 French Tips Nails That Look Insanely Expensive
You love a classic French tip, but you want it fresher, cooler, and way more you. Good news: today’s French isn’t just sheer pink and white—it’s color, chrome, angles, and a little attitude. These ideas boost your mani from “nice” to “who is her manicurist?” in minutes. Ready to make your fingertips the main character?
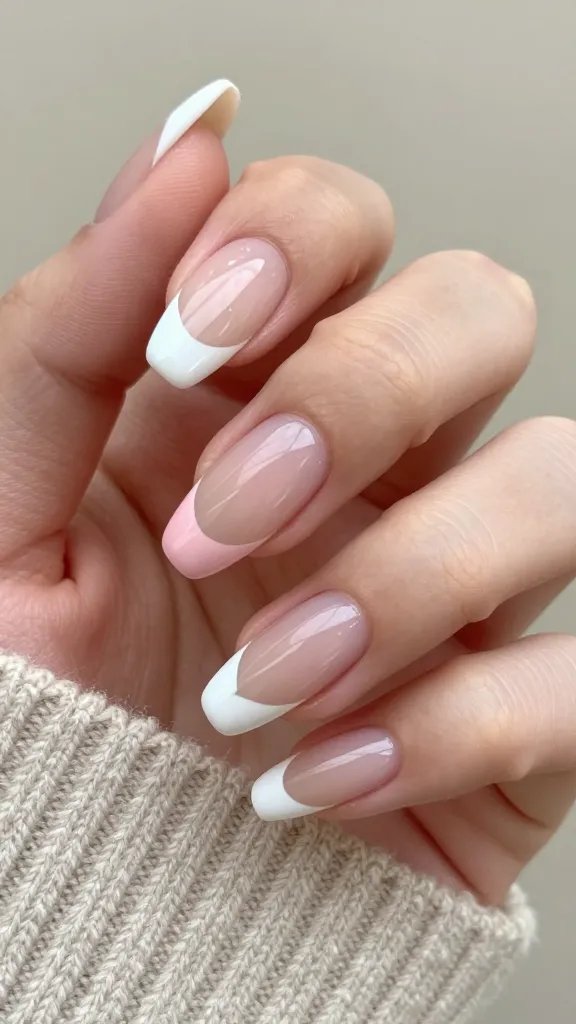
1. The Micro-French That Looks Expensive
Overeating doesn’t mean something is wrong with you. It means your system needs a reset.
If cravings keep pulling you off track, this helps you regain control without restriction. You’ll learn simple, realistic steps to stop overeating and feel satisfied again.
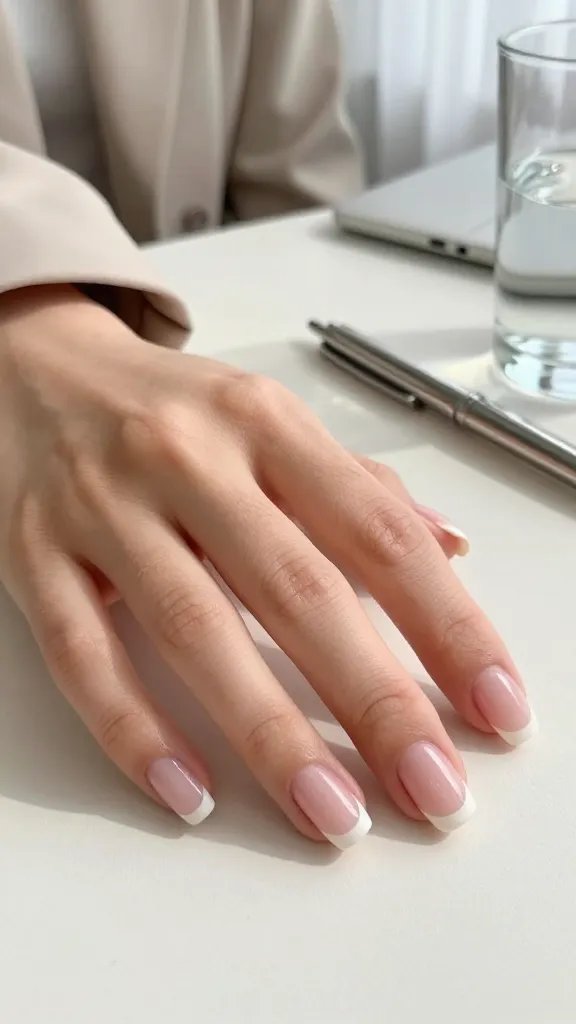
Thin, razor-fine tips scream subtle luxury. The micro-French keeps your nails clean, modern, and office-friendly while still giving you that crisp, polished look. It flatters every nail length and shape, making short nails feel chic instead of stubby.
Tips:
- Use a sheer pink or milky base for that “your nails but better” glow.
- Paint the thinnest line you can—think hairline, not highway.
- Try a striping brush or a detailer pen for precision.
Wear this when you want quiet confidence—you’ll look put-together without trying too hard.
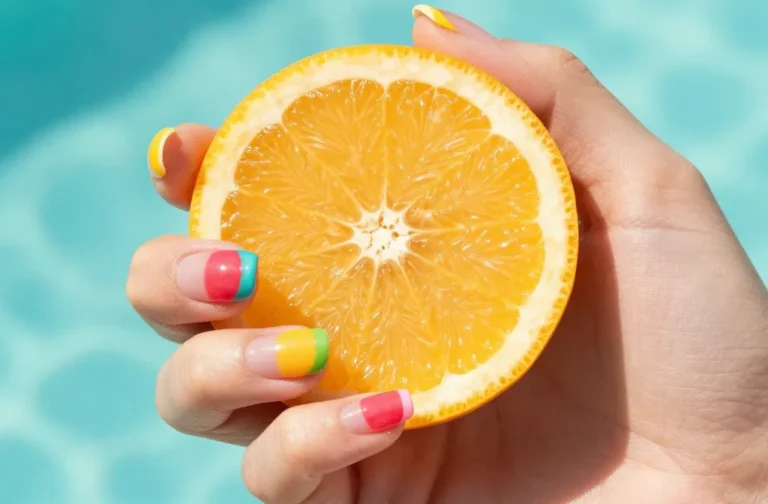
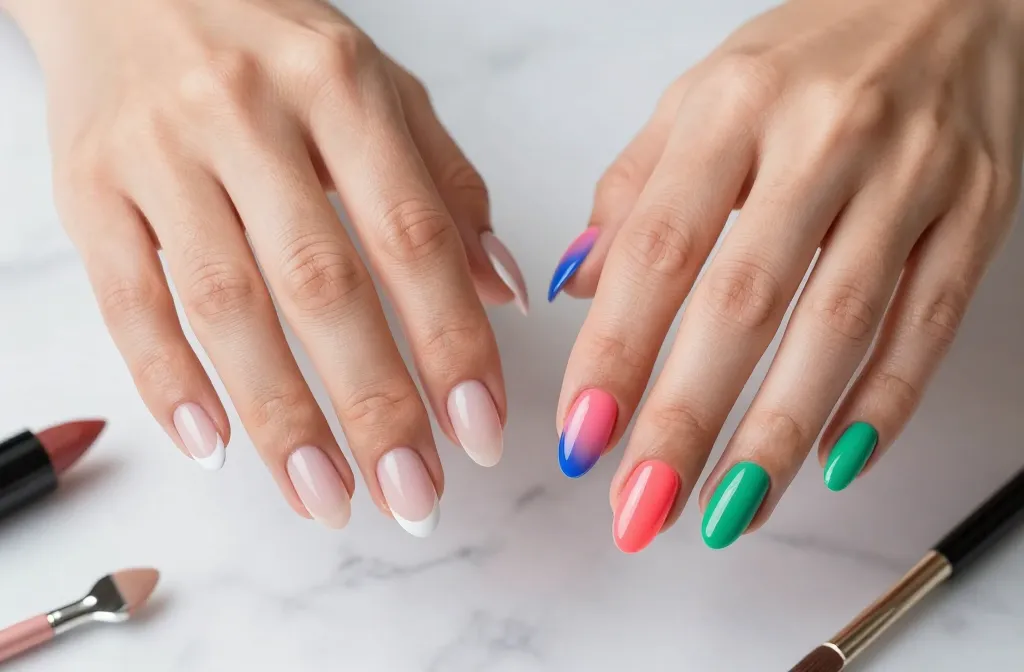
2. Color-Pop French For The Maximalist Mood
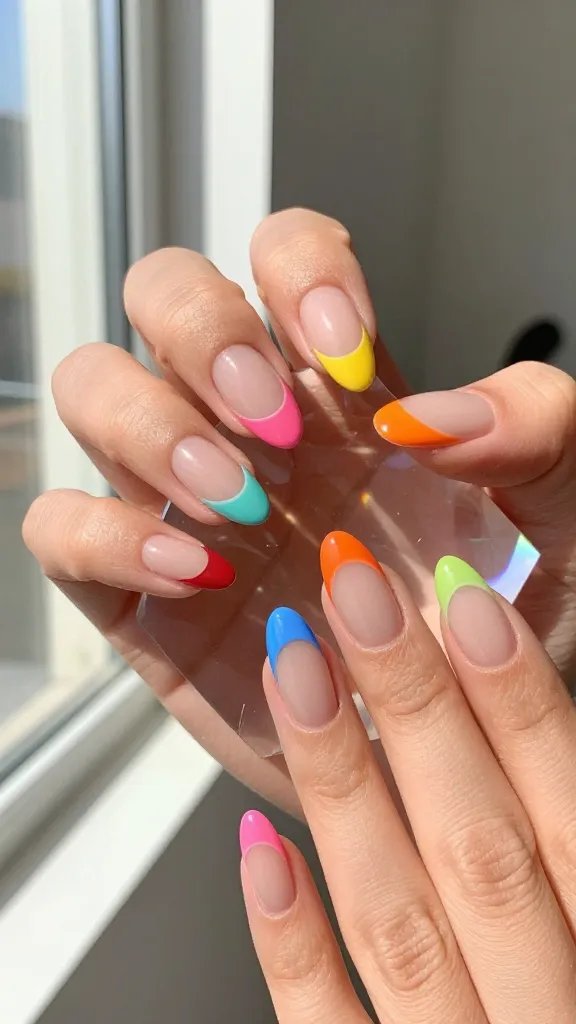
Swap the white for bold hues and watch your nails go from classic to cool. Neon coral, cobalt blue, or lime green turns a simple look into instant dopamine dressing. The best part? You still keep the French silhouette, so it never feels chaotic.
Color Ideas:
- Summer: Hot pink, tangerine, turquoise
- Fall: Burnt orange, olive, plum
- Winter: Emerald, cherry, icy blue
- Spring: Butter yellow, lilac, mint
Use this for vacations, festivals, or anytime your outfit needs a little happy boost.
3. The Double Line For Artsy Minimalists
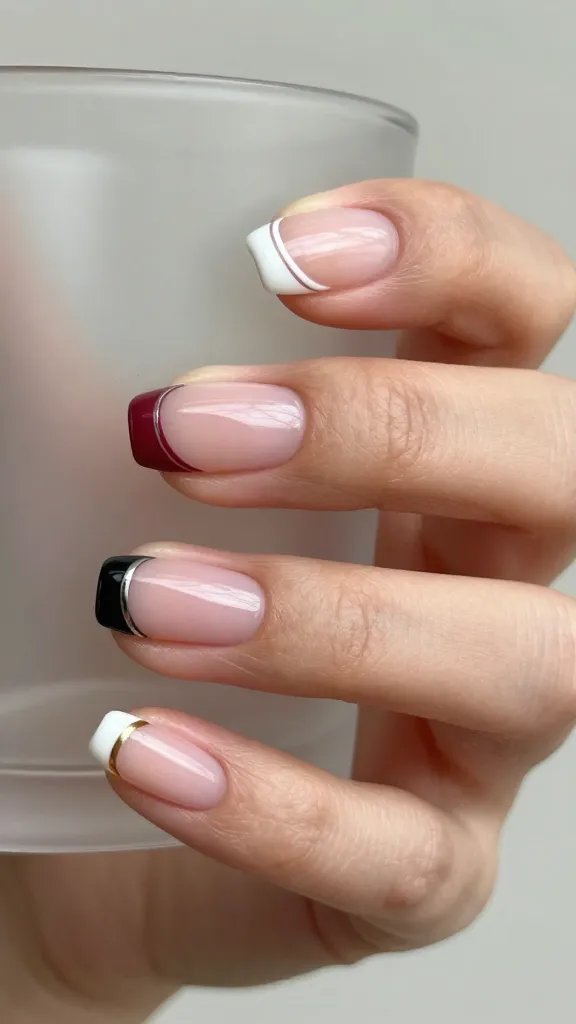
Two slim lines stacked on the tip look graphic and intentional without requiring “nail art” skills. You can keep both lines white or mix colors—white with gold, blush with burgundy, black with chrome. It’s that simple trick that makes people stare.
How-To:
- Start with a standard French tip.
- Add a second, thinner line parallel to the first—leave a tiny gap between.
- Seal with a glossy top coat so it looks seamless.
Reach for this when you want a gallery-opening vibe on a Tuesday.
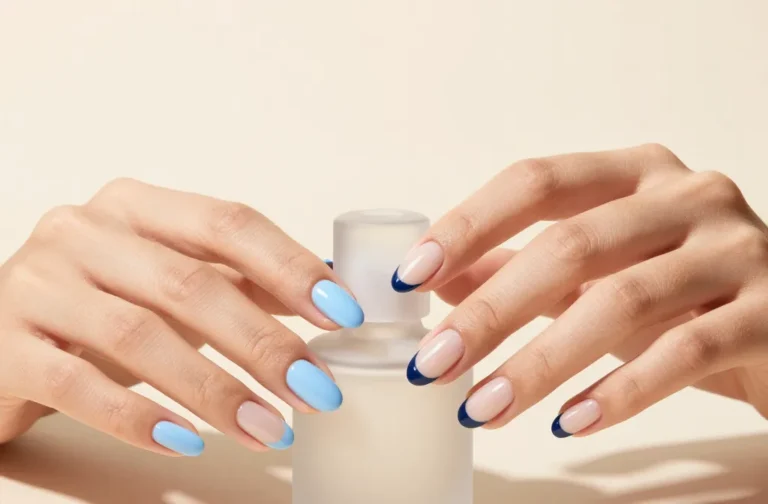
4. V-French (Chevron Tips) For Instant Edge
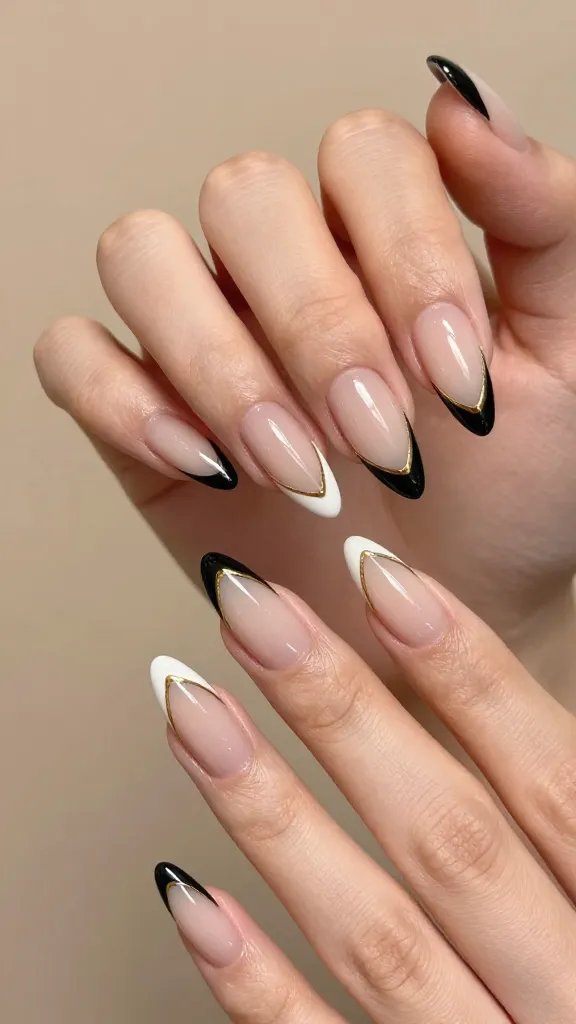
Swap the curved smile line for a V-shaped tip to sharpen your whole manicure. The point elongates your nails and flatters almond, stiletto, and coffin shapes especially well. It gives the same “French” feeling, but with a fashion-forward twist.
Pro Moves:
- Use striping tape to map the V shape before painting.
- Try contrasting shades: nude base + black V, or latte base + white V.
- Add a thin metallic outline for drama, IMO the gold looks luxe.
Perfect for date nights and events where you want a little main-character energy.
5. Chrome-Dusted French For Subtle Sparkle
Chrome tips look like jewelry for your nails—reflective, sleek, and very now. A whisper of chrome over a white or colored tip gives dimension without glitter fallout. Great if you want shine without going full disco ball.
Materials:
- Sheer or milky base polish
- White or colored tip polish
- Chrome powder + sponge applicator
- No-wipe gel top coat (for gel users)
Use this for parties or photos—the camera loves the way chrome catches light.

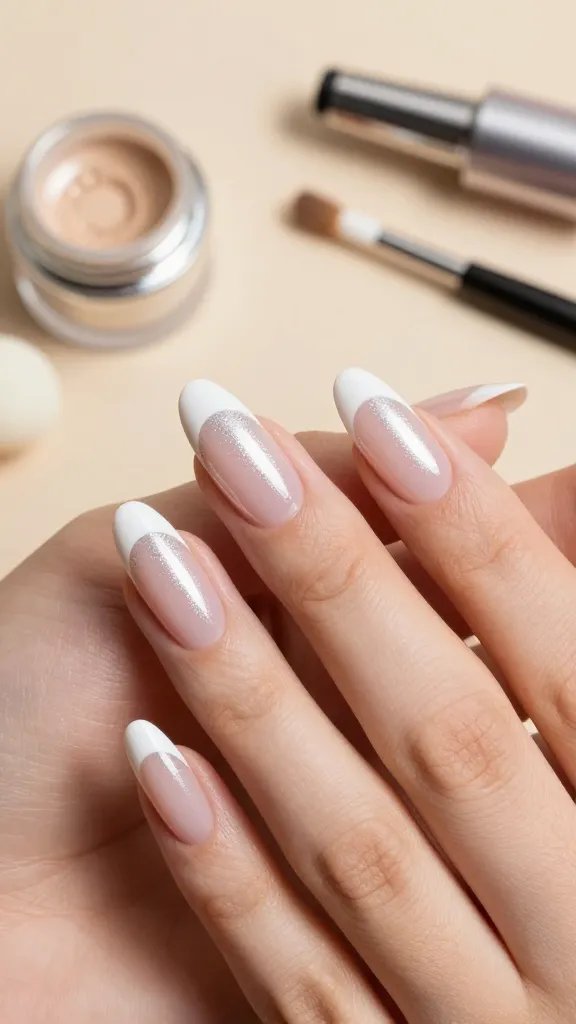
6. Negative Space French For That Clean-Girl Aesthetic
Leave parts of the nail bare to make the tip feel lighter and more modern. Negative space French designs elongate your nail bed and make the whole manicure feel airy. It’s low-maintenance too—chips hide better when half the nail is intentionally naked.
Design Ideas:
- Clear base with a soft white micro tip
- Nude base with a transparent jelly color tip
- Diagonal negative space with a V-French crossover
Pick this for everyday wear—you’ll get mileage, compliments, and easy grow-out.
7. The Gradient French (Ombré Tips) That Blends Like Butter
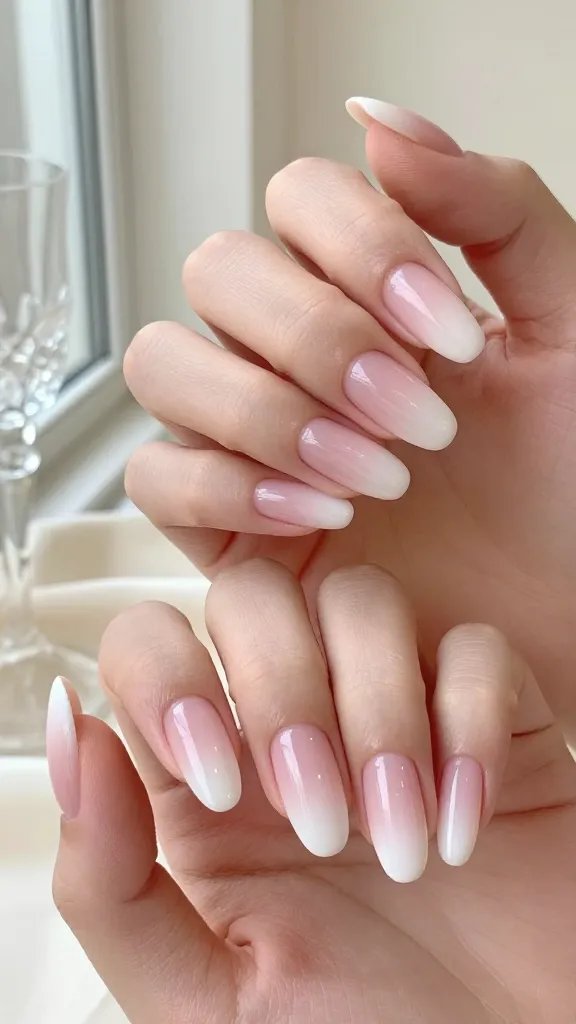
Ombré tips softly fade from your base color into the tip shade, which looks editorial but wearable. It hides minor application mistakes because the blend does the heavy lifting. Want cloud-like softness or moody sunset? Both work.
How To Blend:
- Apply sheer base. Let dry.
- Dab tip color onto a makeup sponge and press onto the nail’s free edge.
- Repeat light layers until you get the fade you want. Top coat to smooth.
Great for weddings, special events, or anyone who loves a soft-focus filter effect IRL.
8. The Metallic Outline French For Maximum Shine
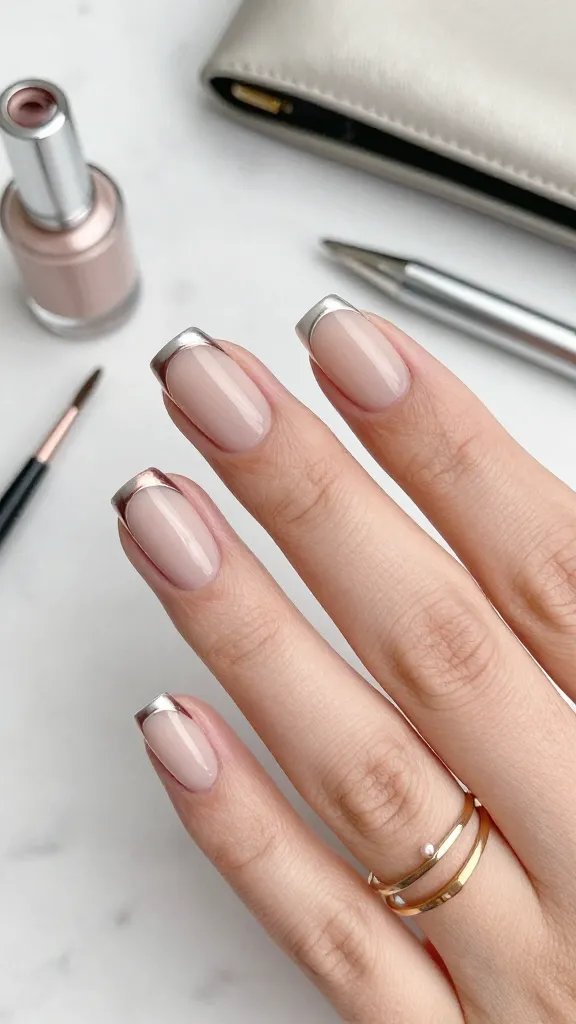
An ultra-thin metallic outline hugs your free edge and turns your mani into instant jewelry. Think of it as a whisper of gold or silver that elevates even a drugstore nude. It pairs perfectly with both short and long nails.
Key Points:
- Use a nail art pen or striping brush with chrome gel paint.
- Keep the line slim—thick lines can look chunky, not chic.
- Try rose gold on warm skin tones and silver on cool, but do you, seriously.
Use for dinners, office days, or whenever your rings need backup.
9. French Tips With Tiny Accents (Pearls, Studs, Or Mini Florals)

Keep the French base and add one tiny detail per nail. Micro pearls along the smile line, a single stud at the apex, or a delicate daisy on an accent nail makes your mani feel bespoke. The trick: restraint.
Accent Ideas:
- Minimal pearls: Three micro pearls centered on the tip
- Single charm: One gold dot at the corner of your smile line
- Baby florals: One tiny bloom on the ring finger only
Perfect when you want pretty without crossing into prom-night territory.
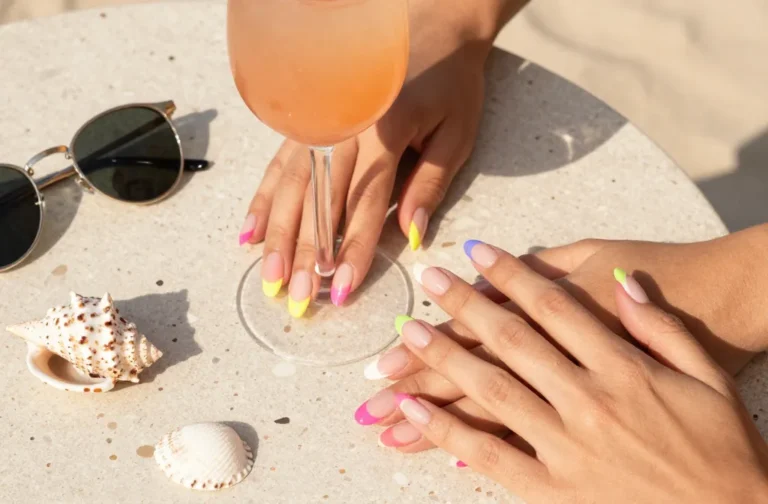
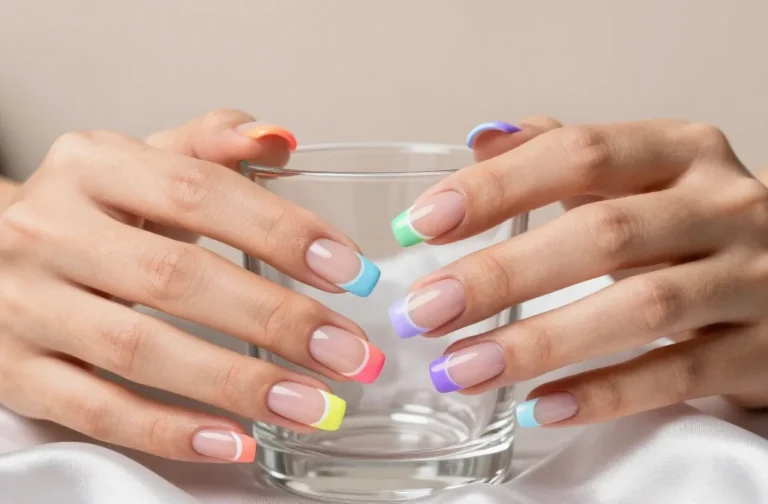
10. The Skittle French—Same Base, Different Tip Colors
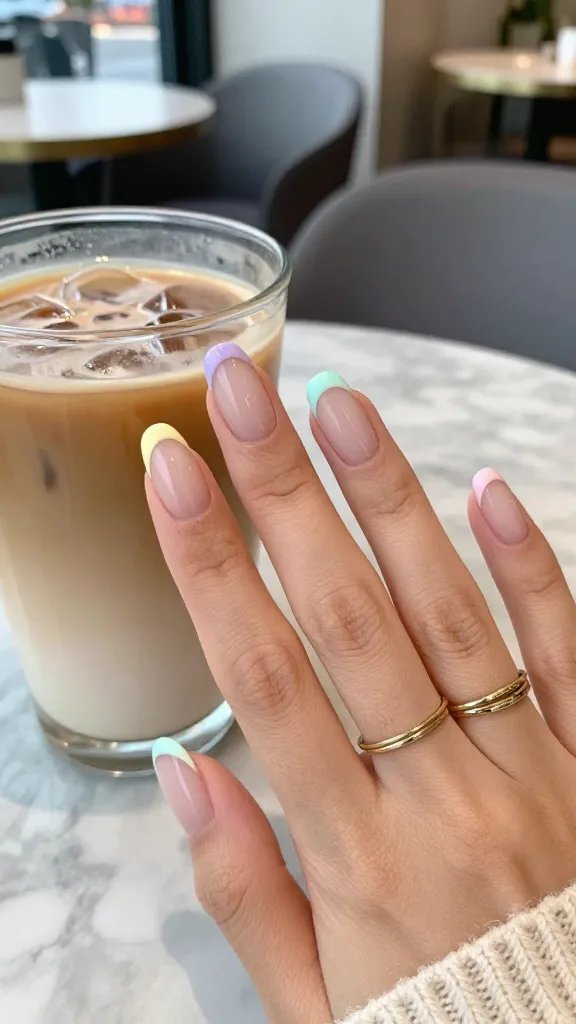
Keep one neutral base and switch up the tip color on each finger. It looks playful and curated, not chaotic, especially if you stick to one palette. Think gelato pastels or moody jewel tones—your call.
Palette Recipes:
- Pastel Gelato: Mint, lilac, butter yellow, baby blue, peach
- Sunset: Coral, tangerine, rose, magenta, plum
- Jewel Box: Emerald, sapphire, ruby, amethyst, topaz
Use for weekends, brunches, or any time you want compliments from strangers at the coffee line. FYI, it photographs beautifully.
Ready to give your French tips a glow-up? Pick one idea and try it on two nails first—you’ll know instantly if it’s your vibe. Then level up across the whole set and enjoy that “did you get these done?” energy every time you check your phone. Trust me, your nails are about to become your favorite accessory.